


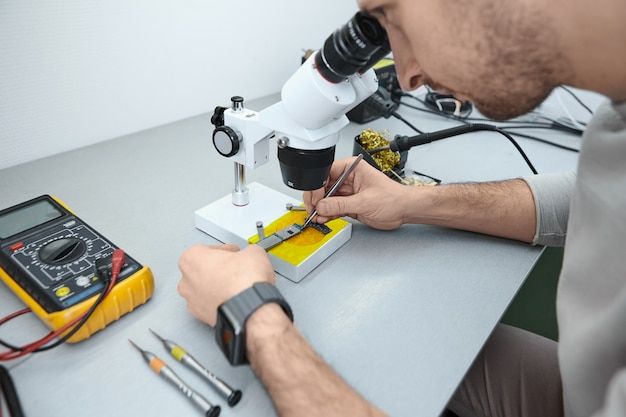
Microscope for mobile phone repair is an essential tool for technicians who work on smartphone motherboards, small electronic components, solder joints, and chip-level repairs. Modern smartphones contain extremely small components that can be difficult to inspect with the naked eye. A good repair microscope can provide the magnification and visibility needed for accurate diagnosis and precision work.
Choosing the right microscope can be confusing because there are many models with different magnification levels, cameras, lighting systems, stands, and working distances. The best option depends on the type of repair work you perform and the level of detail you need.
In this guide, we will explain the important features to consider when choosing a microscope for mobile phone repair.
Why Is a Microscope Important for Mobile Phone Repair?
Smartphone motherboards contain tiny components such as ICs, capacitors, resistors, coils, connectors, and solder points. Many of these components are too small to inspect accurately without magnification.
A microscope can help technicians:
- Inspect motherboard components
- Identify damaged solder joints
- Find broken PCB tracks
- Examine corrosion
- Check small connectors
- Perform micro-soldering
- Inspect ICs
- Work with tiny SMD components
- Identify solder bridges
- Improve repair precision
For technicians performing chip-level or motherboard repair, good visibility is particularly important.
What Type of Microscope Is Best for Mobile Repair?
There are several types of microscopes available for electronics repair.
For professional smartphone repair, a stereo microscope is often useful because it provides depth perception while working with small components.
Digital microscopes with cameras can also be useful when technicians want to display the magnified image on a monitor.
The best choice depends on your repair workflow, workspace, budget, and whether you need image or video recording.
1. Consider the Magnification Range
Magnification is one of the first specifications technicians look at when buying a microscope.
A microscope with adjustable magnification gives you greater flexibility.
Lower magnification can be useful for viewing a larger area of the motherboard, while higher magnification can help with very small components and detailed soldering work.
However, maximum magnification is not always the most important factor.
Extremely high magnification can reduce the visible working area and make it harder to move tools around the board.
For this reason, a microscope with a practical adjustable range can be more useful than simply choosing the model with the highest advertised magnification.
2. Check the Working Distance
Working distance refers to the space between the microscope lens and the object being inspected.
This is especially important for mobile motherboard repair.
Technicians need enough room to position soldering irons, tweezers, probes, and other tools underneath the microscope.
If the working distance is too short, it can be difficult to perform repairs comfortably.
When choosing a microscope for mobile phone repair, look for a model that provides sufficient space between the lens and motherboard.
3. Choose Good Optical Quality
Magnification alone does not guarantee a clear image.
Optical quality is extremely important when inspecting tiny components.
A good microscope should provide:
- Clear images
- Good edge definition
- Minimal distortion
- Consistent focus
- Comfortable viewing
Clear optics allow technicians to distinguish between small components, solder joints, PCB tracks, and corrosion more easily.
4. Consider Binocular or Trinocular Design
Microscopes for electronics repair can have different viewing configurations.
Binocular Microscope
A binocular microscope allows the technician to look through two eyepieces.
This can provide a more comfortable viewing experience and depth perception during repair work.
Trinocular Microscope
A trinocular microscope adds a separate camera port.
This can be useful for technicians who want to connect a camera and display the motherboard image on a monitor.
For training centres, repair workshops, and technicians who create repair documentation, a trinocular setup can provide additional flexibility.
5. Check Camera Compatibility
A microscope camera can be useful when technicians want to view the motherboard on a larger screen.
A camera can help with:
- Recording repair procedures
- Taking inspection images
- Training students
- Sharing repair views
- Working while looking at a monitor
Mtools currently offers microscope-related products and accessories, including microscope cameras and the MIJING 6565 Pro microscope.
If you plan to use a camera, check compatibility with the microscope and the display or computer you intend to connect.
6. Look for Good Lighting
Proper lighting is essential for motherboard inspection.
Tiny components can be difficult to see if shadows or reflections are present.
Many electronics microscopes use LED lighting to illuminate the work area.
When choosing a microscope, consider:
- Brightness adjustment
- Even illumination
- Shadow reduction
- Ring-light design
- Color consistency
Good lighting can make a major difference when inspecting solder joints and small components.
7. Check the Microscope Stand
The stand is another important part of a repair microscope.
A stable stand helps prevent unwanted movement while working on the motherboard.
A good stand should provide:
- Stability
- Smooth adjustment
- Sufficient working space
- Easy positioning
- Strong support for the microscope
An unstable stand can make precision work difficult, especially during micro-soldering.
8. Consider Your Workspace
Before purchasing a microscope, measure your repair table.
Check the available space for:
- Microscope stand
- Motherboard
- Soldering station
- Hot air station
- DC power supply
- Multimeter
- Tools and components
A large professional microscope may provide excellent functionality, but it may not be practical for a small repair workstation.
Choose equipment that fits your actual workspace.
9. Microscope for Micro-Soldering
Micro-soldering is one of the main applications for a repair microscope.
During motherboard repair, technicians may work with extremely small components and solder points.
A suitable microscope should provide enough magnification while maintaining a comfortable working distance.
This allows technicians to position the soldering iron and other tools accurately.
A clear view is particularly useful when working on:
- SMD components
- Small IC connections
- PCB tracks
- Connectors
- Jumper wires
- Fine solder joints
10. Inspecting Smartphone Motherboards
A microscope for mobile phone repair can also help during motherboard diagnosis.
Technicians can inspect the board for:
- Burn marks
- Corrosion
- Missing components
- Cracked solder joints
- Damaged tracks
- Solder bridges
- Physical component damage
Visual inspection is often an important part of the diagnostic process before electrical testing begins.
Microscope vs. Magnifying Glass
A basic magnifying glass can be useful for simple inspection, but it has limitations.
A professional microscope provides significantly better visibility for precision electronics work.
A microscope can offer:
- Higher magnification
- Better image clarity
- Depth perception
- Stable viewing
- Better working space
- Camera integration on suitable models
For basic repairs, a magnifying tool may be sufficient. For regular motherboard and chip-level work, a dedicated microscope is generally more practical.
Common Mistakes When Buying a Repair Microscope
Technicians sometimes focus only on magnification when choosing a microscope.
Here are some mistakes to avoid.
Choosing the Highest Magnification
More magnification does not automatically mean better repair performance.
Ignoring Working Distance
A microscope with insufficient working distance can make soldering uncomfortable.
Ignoring Stand Quality
A poor-quality stand can introduce unwanted movement.
Overlooking Lighting
Even a good optical system can be difficult to use without adequate illumination.
Buying Without Checking Camera Support
If you plan to use a monitor or camera, check compatibility before purchasing.
Ignoring Workspace Requirements
Make sure the microscope fits comfortably on your repair bench.
What Other Tools Work With a Microscope?
A microscope is only one part of a professional mobile repair workstation.
Depending on the type of repair, technicians may also need:
- Soldering station
- Hot air rework station
- DC power supply
- Digital multimeter
- Precision tweezers
- Soldering tips
- Flux
- Solder wire
- PCB holder
- ESD-safe working mat
- Cleaning tools
Mtools currently lists a broad range of mobile repair equipment, including soldering and desoldering equipment, DC power supplies, microscopes, tweezers, flux and paste, working mats, and other repair accessories.
How to Maintain Your Repair Microscope
Proper maintenance can help keep the microscope performing well.
Keep the Lens Clean
Dust and fingerprints can reduce image quality. Clean optical surfaces using appropriate lens-cleaning materials.
Protect the Microscope From Dust
When the microscope is not being used, cover it to reduce dust accumulation.
Keep the Stand Stable
Check that the stand and adjustment mechanisms remain secure.
Avoid Excessive Movement
Handle the microscope carefully when changing its position.
Protect the Camera
If your microscope has a camera, keep the sensor and lens protected from dust and contamination.
How Much Should You Spend on a Mobile Repair Microscope?
The ideal budget depends on your repair requirements.
A beginner working on basic electronics may not need an advanced professional setup.
A technician performing regular motherboard repair may benefit from investing in better optics, a stable stand, adjustable magnification, and a suitable working distance.
Professional repair workshops may also consider a trinocular microscope with camera support.
Instead of choosing purely based on price, compare:
- Optical quality
- Magnification range
- Working distance
- Stand quality
- Lighting
- Camera compatibility
- Build quality
- Availability of accessories
The right balance of features can provide better long-term value.
Who Needs a Microscope for Mobile Phone Repair?
A repair microscope can be useful for:
- Mobile phone technicians
- Chip-level repair technicians
- Motherboard repair professionals
- Electronics repair shops
- Mobile repair training institutes
- Smartphone refurbishment businesses
- Electronics hobbyists
If your work involves inspecting or repairing tiny motherboard components regularly, a microscope can become one of the most useful tools on your workbench.
Final Thoughts
Choosing the right microscope for mobile phone repair is an important decision for technicians who work with smartphone motherboards and micro-components.
Instead of focusing only on magnification, consider optical quality, working distance, lighting, stand stability, camera support, and workspace requirements.
A good microscope can make it easier to inspect tiny components, identify motherboard faults, perform micro-soldering, and improve repair precision.
Mtools provides a range of professional mobile repair tools and equipment, including microscopes, soldering equipment, working mats, testing tools, and other accessories designed for repair technicians.
Whether you are setting up your first repair workstation or upgrading an existing workshop, choosing equipment based on your actual repair requirements can help you create a more efficient and professional mobile repair setup.