


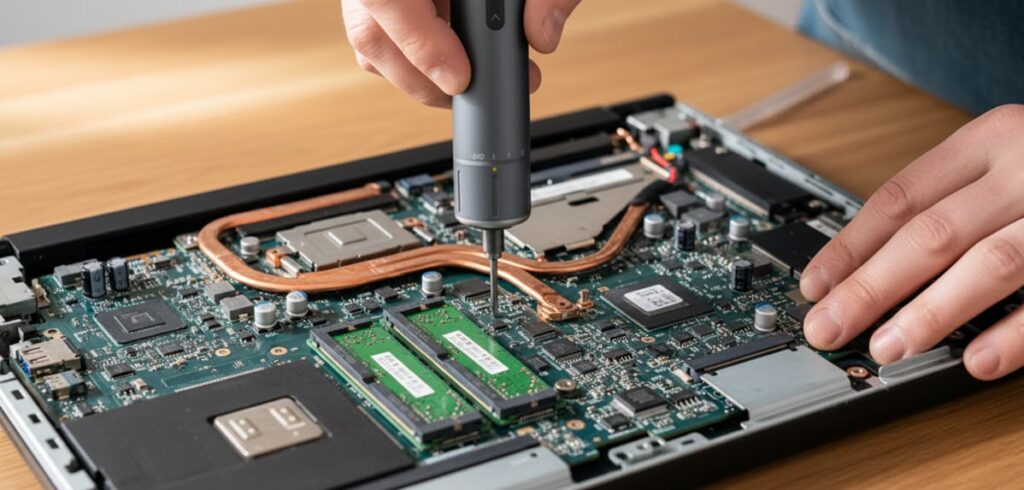
Ultrasonic cleaner for mobile repair is a useful piece of equipment for technicians who need to clean mobile phone motherboards and other small electronic components. During mobile repair, dust, flux residue, dirt, corrosion, and other contaminants can accumulate around components and circuit-board areas. Proper cleaning can help technicians inspect and maintain boards more effectively.
Unlike ordinary cleaning methods, an ultrasonic cleaner uses high-frequency sound waves to create microscopic cleaning action in a suitable cleaning solution. This process can help reach small areas that are difficult to clean manually.
For mobile repair technicians, understanding how to use an ultrasonic cleaner correctly is important because smartphone motherboards contain sensitive electronic components.
What Is an Ultrasonic Cleaner?
An ultrasonic cleaner is a cleaning device that uses high-frequency sound waves to create microscopic bubbles in a liquid. The movement of these bubbles produces a cleaning action that can help loosen contaminants from surfaces and hard-to-reach areas.
In mobile phone repair, ultrasonic cleaners can be used for suitable motherboard-cleaning applications. Mtools, for example, lists ultrasonic-cleaning equipment designed for mobile motherboard cleaning.
The goal is not simply to make the motherboard look clean. Proper cleaning can help remove unwanted residues and contaminants from areas around electronic components.
Why Is Cleaning Important in Mobile Repair?
A smartphone motherboard contains many small components positioned close together. During repair work, materials such as flux, solder residue, dust, and dirt can remain around the repair area.
Cleaning can be particularly useful after certain repair procedures where residue has accumulated.
Some common reasons for motherboard cleaning include:
- Removing flux residue
- Cleaning dirt and dust
- Removing certain contaminants
- Cleaning areas affected by corrosion
- Preparing a board for inspection
- Improving the visibility of repair areas
- Maintaining a cleaner repair workstation
However, cleaning should always be performed according to the requirements of the particular board and components.
How Does an Ultrasonic Cleaner Work?
The ultrasonic cleaning process generally involves high-frequency sound waves passing through a liquid.
These waves create microscopic bubbles that rapidly form and collapse. This activity produces a cleaning effect that can help loosen contaminants from surfaces and small spaces.
The advantage is that the cleaning action can reach areas that may be difficult to access using a brush or cloth.
For mobile motherboard work, this can be useful because components and soldered connections are often extremely small.
How to Use an Ultrasonic Cleaner for Mobile Repair
Before using an ultrasonic cleaner, technicians should understand the equipment manufacturer’s instructions and make sure the item being cleaned is suitable for the process.
Step 1: Inspect the Motherboard
Before cleaning, inspect the motherboard carefully.
Look for:
- Visible corrosion
- Broken components
- Damaged connectors
- Loose parts
- Burn marks
- Existing physical damage
Documenting the condition of the board before cleaning can also help during troubleshooting.
Step 2: Remove Unnecessary Parts
Depending on the phone and the cleaning procedure, some components or removable parts may need to be removed before cleaning.
Technicians should never assume that every electronic component is safe to place in an ultrasonic cleaner.
Sensitive components and assemblies should be handled according to their specific requirements.
Step 3: Select the Appropriate Cleaning Solution
The cleaning solution is an important part of the process.
Use a solution that is specifically appropriate for the electronic components and cleaning equipment being used. Avoid experimenting with random chemicals because unsuitable liquids can damage components, coatings, adhesives, or other materials.
Always follow the cleaner manufacturer’s recommendations.
Step 4: Place the Board Correctly
The motherboard should be positioned carefully inside the cleaning tank.
Avoid overcrowding the tank with multiple items if doing so prevents proper cleaning.
The board should be fully exposed to the cleaning action rather than being placed in a way that blocks important areas.
Step 5: Set the Cleaning Parameters
Ultrasonic cleaners can have different operating settings.
Depending on the equipment, technicians may be able to adjust settings such as:
- Cleaning time
- Temperature
- Ultrasonic intensity
- Operating mode
The correct settings depend on the equipment, cleaning solution, and item being cleaned.
For sensitive electronic assemblies, technicians should avoid assuming that longer or stronger cleaning is always better.
Step 6: Remove and Inspect the Board
After the cleaning cycle, carefully remove the motherboard and inspect it.
Look for remaining contamination, corrosion, or other visible issues.
If additional cleaning is necessary, follow the equipment and solution manufacturer’s instructions rather than repeatedly increasing the cleaning intensity without checking the board.
Step 7: Dry the Motherboard Completely
Drying is one of the most important steps.
The motherboard should be completely dry before it is powered or tested.
Any remaining moisture can create electrical problems or potentially damage the board.
Use an appropriate drying procedure recommended for electronic assemblies and the cleaning equipment being used.
Benefits of an Ultrasonic Cleaner for Mobile Repair
Using suitable ultrasonic-cleaning equipment can offer several advantages to repair technicians.
Better Cleaning of Small Areas
Smartphone motherboards contain very small spaces around components. Ultrasonic cleaning can help reach areas that may be difficult to clean manually.
Useful for Motherboard Maintenance
A suitable cleaning process can help technicians maintain boards after repair work or contamination.
Saves Manual Cleaning Effort
Compared with manually cleaning every small area with a brush, an ultrasonic cleaner can provide a more consistent cleaning process when used correctly.
Helps With Inspection
A cleaner board can make it easier to inspect components, solder joints, and affected areas during troubleshooting.
Important Precautions
An ultrasonic cleaner should not be treated as a universal solution for every electronic device.
Technicians should consider the following precautions:
- Read the equipment instructions before use.
- Use an appropriate cleaning solution.
- Do not place unsuitable components in the cleaner.
- Avoid excessive cleaning time.
- Follow recommended temperature settings.
- Handle the motherboard carefully.
- Ensure complete drying before testing.
- Inspect the board after cleaning.
- Follow component and manufacturer-specific recommendations.
The exact cleaning procedure can vary depending on the motherboard, components, cleaning equipment, and solution.
Ultrasonic Cleaner vs Manual Cleaning
Manual cleaning usually involves tools such as brushes, cleaning liquids, wipes, or specialized PCB-cleaning products.
Manual cleaning can provide direct control over a specific area. However, it may take more time when contaminants are located around many small components.
An ultrasonic cleaner provides a different approach by using ultrasonic energy through a liquid to assist the cleaning process.
Both methods can have a place in a professional repair environment. The appropriate method depends on the board, contamination, repair procedure, and manufacturer’s recommendations.
Choosing an Ultrasonic Cleaner for Mobile Repair
Before purchasing an ultrasonic cleaner, consider several factors.
Tank Capacity
Choose a tank size suitable for the type and quantity of components you normally work with.
Operating Controls
Easy-to-use controls can make it simpler to adjust cleaning settings according to the application.
Cleaning Performance
Look for equipment designed for the type of cleaning work you intend to perform.
Build Quality
A reliable tank and durable construction are important for technicians who use cleaning equipment regularly.
Compatibility
Most importantly, check whether the cleaner and cleaning solution are suitable for the electronic components you intend to clean.
Mtools currently lists ultrasonic-cleaning equipment among its mobile-repair categories, along with other equipment such as PCB cleaners, microscopes, soldering stations, multimeters, and rework stations.
Building a Professional Mobile Repair Workstation
An ultrasonic cleaner can be one part of a complete mobile repair workstation.
Depending on the type of repair work, technicians may also use:
- Microscope
- Soldering station
- Hot air rework station
- Digital multimeter
- DC power supply
- Precision tweezers
- PCB holder
- Flux
- Cleaning brushes
- PCB cleaning products
- Appropriate safety equipment
Mtools has categories covering many of these repair tools and equipment, including microscopes, soldering stations, multimeters, PCB cleaners, ultrasonic cleaners, and SMD rework stations.
Final Thoughts
An ultrasonic cleaner for mobile repair can be a useful addition to a professional smartphone repair workstation when it is used correctly. It can help technicians clean suitable motherboards and components, remove certain contaminants, and prepare boards for further inspection.
However, ultrasonic cleaning should always be approached carefully. Not every component or assembly is suitable for ultrasonic cleaning, and the wrong cleaning solution, temperature, or cleaning time can cause damage.
For professional technicians, the best approach is to understand the equipment, follow manufacturer instructions, select suitable cleaning solutions, and ensure the motherboard is completely dry before testing.
With the right procedure and appropriate equipment, ultrasonic cleaning can become a useful part of a structured mobile motherboard maintenance and repair workflow.
Ultrasonic cleaner for mobile repair is a useful piece of equipment for technicians who need to clean mobile phone motherboards and other small electronic components. During mobile repair, dust, flux residue, dirt, corrosion, and other contaminants can accumulate around components and circuit-board areas. Proper cleaning can help technicians inspect and maintain boards more effectively.
Unlike ordinary cleaning methods, an ultrasonic cleaner uses high-frequency sound waves to create microscopic cleaning action in a suitable cleaning solution. This process can help reach small areas that are difficult to clean manually.
For mobile repair technicians, understanding how to use an ultrasonic cleaner correctly is important because smartphone motherboards contain sensitive electronic components.
What Is an Ultrasonic Cleaner?
An ultrasonic cleaner is a cleaning device that uses high-frequency sound waves to create microscopic bubbles in a liquid. The movement of these bubbles produces a cleaning action that can help loosen contaminants from surfaces and hard-to-reach areas.
In mobile phone repair, ultrasonic cleaners can be used for suitable motherboard-cleaning applications. Mtools, for example, lists ultrasonic-cleaning equipment designed for mobile motherboard cleaning.
The goal is not simply to make the motherboard look clean. Proper cleaning can help remove unwanted residues and contaminants from areas around electronic components.
Why Is Cleaning Important in Mobile Repair?
A smartphone motherboard contains many small components positioned close together. During repair work, materials such as flux, solder residue, dust, and dirt can remain around the repair area.
Cleaning can be particularly useful after certain repair procedures where residue has accumulated.
Some common reasons for motherboard cleaning include:
- Removing flux residue
- Cleaning dirt and dust
- Removing certain contaminants
- Cleaning areas affected by corrosion
- Preparing a board for inspection
- Improving the visibility of repair areas
- Maintaining a cleaner repair workstation
However, cleaning should always be performed according to the requirements of the particular board and components.
How Does an Ultrasonic Cleaner Work?
The ultrasonic cleaning process generally involves high-frequency sound waves passing through a liquid.
These waves create microscopic bubbles that rapidly form and collapse. This activity produces a cleaning effect that can help loosen contaminants from surfaces and small spaces.
The advantage is that the cleaning action can reach areas that may be difficult to access using a brush or cloth.
For mobile motherboard work, this can be useful because components and soldered connections are often extremely small.
How to Use an Ultrasonic Cleaner for Mobile Repair
Before using an ultrasonic cleaner, technicians should understand the equipment manufacturer’s instructions and make sure the item being cleaned is suitable for the process.
Step 1: Inspect the Motherboard
Before cleaning, inspect the motherboard carefully.
Look for:
- Visible corrosion
- Broken components
- Damaged connectors
- Loose parts
- Burn marks
- Existing physical damage
Documenting the condition of the board before cleaning can also help during troubleshooting.
Step 2: Remove Unnecessary Parts
Depending on the phone and the cleaning procedure, some components or removable parts may need to be removed before cleaning.
Technicians should never assume that every electronic component is safe to place in an ultrasonic cleaner.
Sensitive components and assemblies should be handled according to their specific requirements.
Step 3: Select the Appropriate Cleaning Solution
The cleaning solution is an important part of the process.
Use a solution that is specifically appropriate for the electronic components and cleaning equipment being used. Avoid experimenting with random chemicals because unsuitable liquids can damage components, coatings, adhesives, or other materials.
Always follow the cleaner manufacturer’s recommendations.
Step 4: Place the Board Correctly
The motherboard should be positioned carefully inside the cleaning tank.
Avoid overcrowding the tank with multiple items if doing so prevents proper cleaning.
The board should be fully exposed to the cleaning action rather than being placed in a way that blocks important areas.
Step 5: Set the Cleaning Parameters
Ultrasonic cleaners can have different operating settings.
Depending on the equipment, technicians may be able to adjust settings such as:
- Cleaning time
- Temperature
- Ultrasonic intensity
- Operating mode
The correct settings depend on the equipment, cleaning solution, and item being cleaned.
For sensitive electronic assemblies, technicians should avoid assuming that longer or stronger cleaning is always better.
Step 6: Remove and Inspect the Board
After the cleaning cycle, carefully remove the motherboard and inspect it.
Look for remaining contamination, corrosion, or other visible issues.
If additional cleaning is necessary, follow the equipment and solution manufacturer’s instructions rather than repeatedly increasing the cleaning intensity without checking the board.
Step 7: Dry the Motherboard Completely
Drying is one of the most important steps.
The motherboard should be completely dry before it is powered or tested.
Any remaining moisture can create electrical problems or potentially damage the board.
Use an appropriate drying procedure recommended for electronic assemblies and the cleaning equipment being used.
Benefits of an Ultrasonic Cleaner for Mobile Repair
Using suitable ultrasonic-cleaning equipment can offer several advantages to repair technicians.
Better Cleaning of Small Areas
Smartphone motherboards contain very small spaces around components. Ultrasonic cleaning can help reach areas that may be difficult to clean manually.
Useful for Motherboard Maintenance
A suitable cleaning process can help technicians maintain boards after repair work or contamination.
Saves Manual Cleaning Effort
Compared with manually cleaning every small area with a brush, an ultrasonic cleaner can provide a more consistent cleaning process when used correctly.
Helps With Inspection
A cleaner board can make it easier to inspect components, solder joints, and affected areas during troubleshooting.
Important Precautions
An ultrasonic cleaner should not be treated as a universal solution for every electronic device.
Technicians should consider the following precautions:
- Read the equipment instructions before use.
- Use an appropriate cleaning solution.
- Do not place unsuitable components in the cleaner.
- Avoid excessive cleaning time.
- Follow recommended temperature settings.
- Handle the motherboard carefully.
- Ensure complete drying before testing.
- Inspect the board after cleaning.
- Follow component and manufacturer-specific recommendations.
The exact cleaning procedure can vary depending on the motherboard, components, cleaning equipment, and solution.
Ultrasonic Cleaner vs Manual Cleaning
Manual cleaning usually involves tools such as brushes, cleaning liquids, wipes, or specialized PCB-cleaning products.
Manual cleaning can provide direct control over a specific area. However, it may take more time when contaminants are located around many small components.
An ultrasonic cleaner provides a different approach by using ultrasonic energy through a liquid to assist the cleaning process.
Both methods can have a place in a professional repair environment. The appropriate method depends on the board, contamination, repair procedure, and manufacturer’s recommendations.
Choosing an Ultrasonic Cleaner for Mobile Repair
Before purchasing an ultrasonic cleaner, consider several factors.
Tank Capacity
Choose a tank size suitable for the type and quantity of components you normally work with.
Operating Controls
Easy-to-use controls can make it simpler to adjust cleaning settings according to the application.
Cleaning Performance
Look for equipment designed for the type of cleaning work you intend to perform.
Build Quality
A reliable tank and durable construction are important for technicians who use cleaning equipment regularly.
Compatibility
Most importantly, check whether the cleaner and cleaning solution are suitable for the electronic components you intend to clean.
Mtools currently lists ultrasonic-cleaning equipment among its mobile-repair categories, along with other equipment such as PCB cleaners, microscopes, soldering stations, multimeters, and rework stations.
Building a Professional Mobile Repair Workstation
An ultrasonic cleaner can be one part of a complete mobile repair workstation.
Depending on the type of repair work, technicians may also use:
- Microscope
- Soldering station
- Hot air rework station
- Digital multimeter
- DC power supply
- Precision tweezers
- PCB holder
- Flux
- Cleaning brushes
- PCB cleaning products
- Appropriate safety equipment
Mtools has categories covering many of these repair tools and equipment, including microscopes, soldering stations, multimeters, PCB cleaners, ultrasonic cleaners, and SMD rework stations.
Final Thoughts
An ultrasonic cleaner for mobile repair can be a useful addition to a professional smartphone repair workstation when it is used correctly. It can help technicians clean suitable motherboards and components, remove certain contaminants, and prepare boards for further inspection.
However, ultrasonic cleaning should always be approached carefully. Not every component or assembly is suitable for ultrasonic cleaning, and the wrong cleaning solution, temperature, or cleaning time can cause damage.
For professional technicians, the best approach is to understand the equipment, follow manufacturer instructions, select suitable cleaning solutions, and ensure the motherboard is completely dry before testing.
With the right procedure and appropriate equipment, ultrasonic cleaning can become a useful part of a structured mobile motherboard maintenance and repair workflow.